Before creating a Review agent, make sure you have a GitHub or GitLab connector configured and, if you want PR reviews, the SenseLab GitHub App installed.
Name your agent and select its role
Go to Agents in the dashboard and click + New Agent.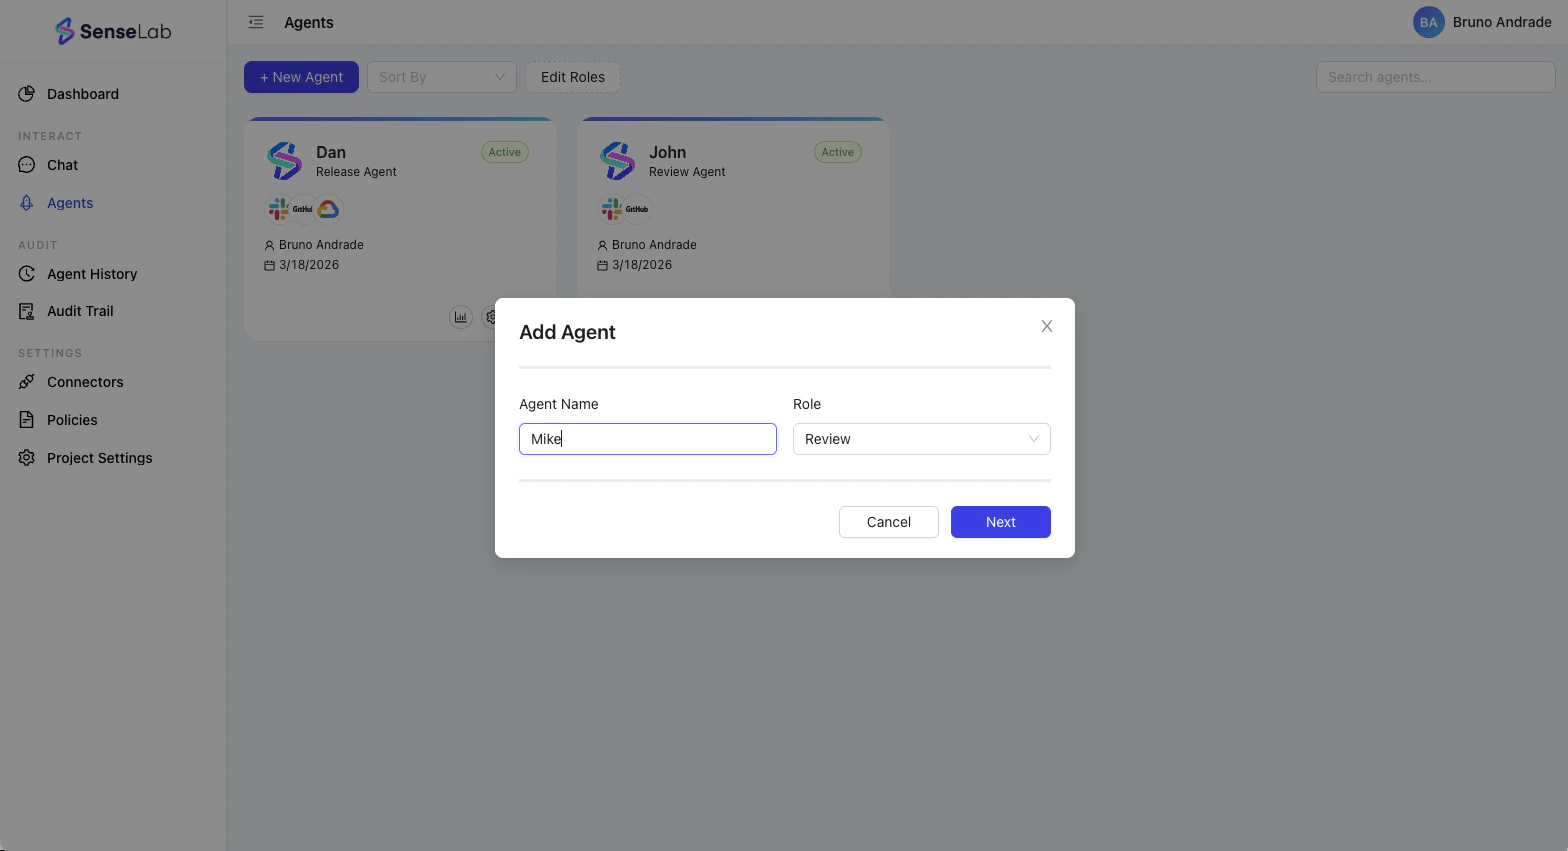
- Agent Name — give your agent a name (e.g.
review-agent1,security-reviewer,frontend-review) - Role — select Review
Step 1 — Select your VCs tool
The agent creation wizard has four steps. The first is selecting which VCS tool the agent will connect to.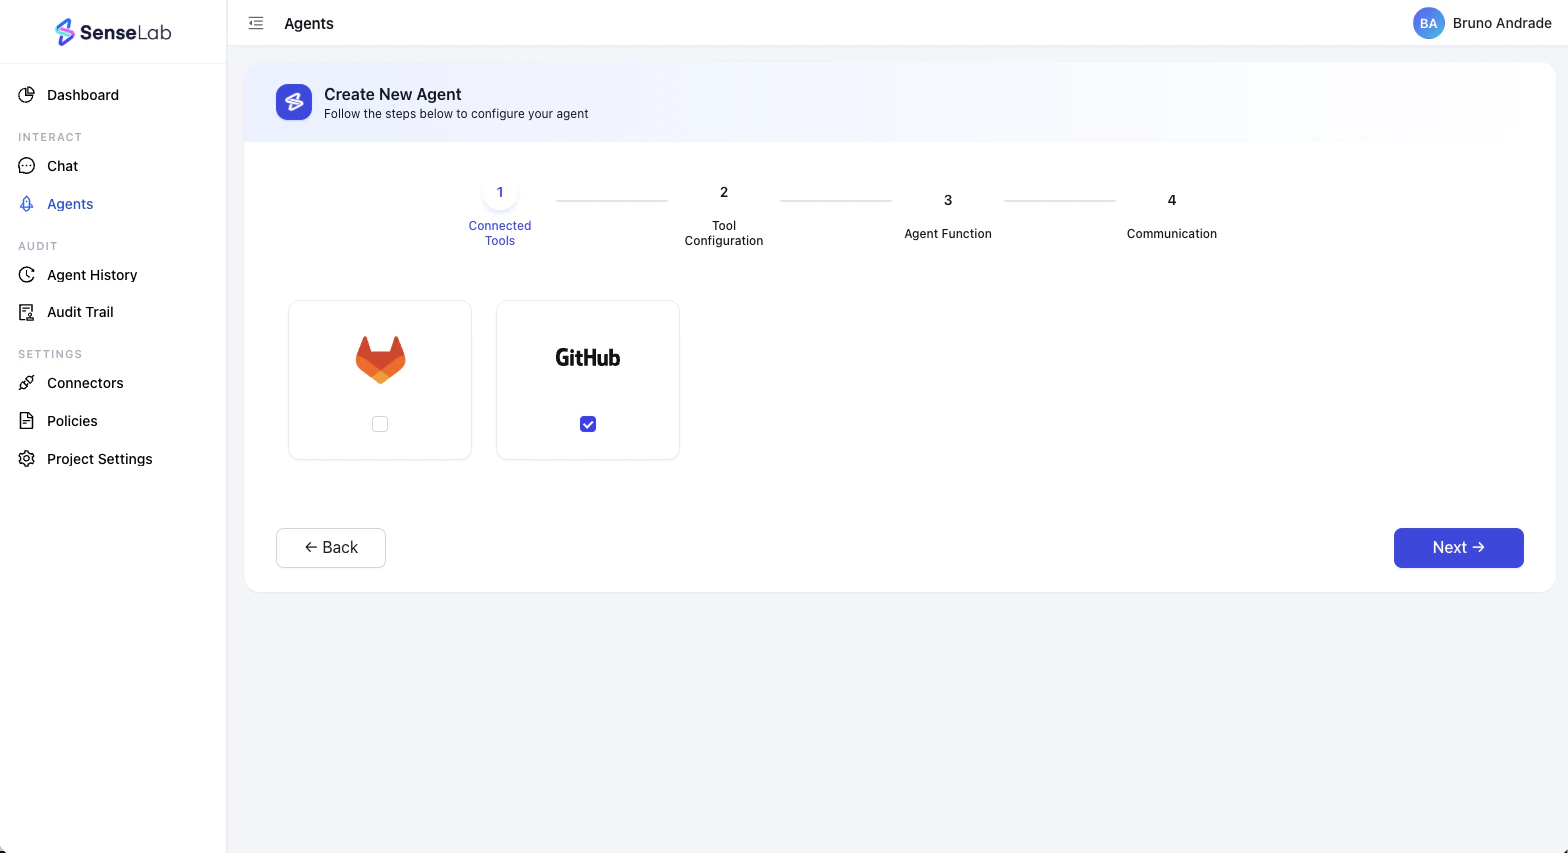
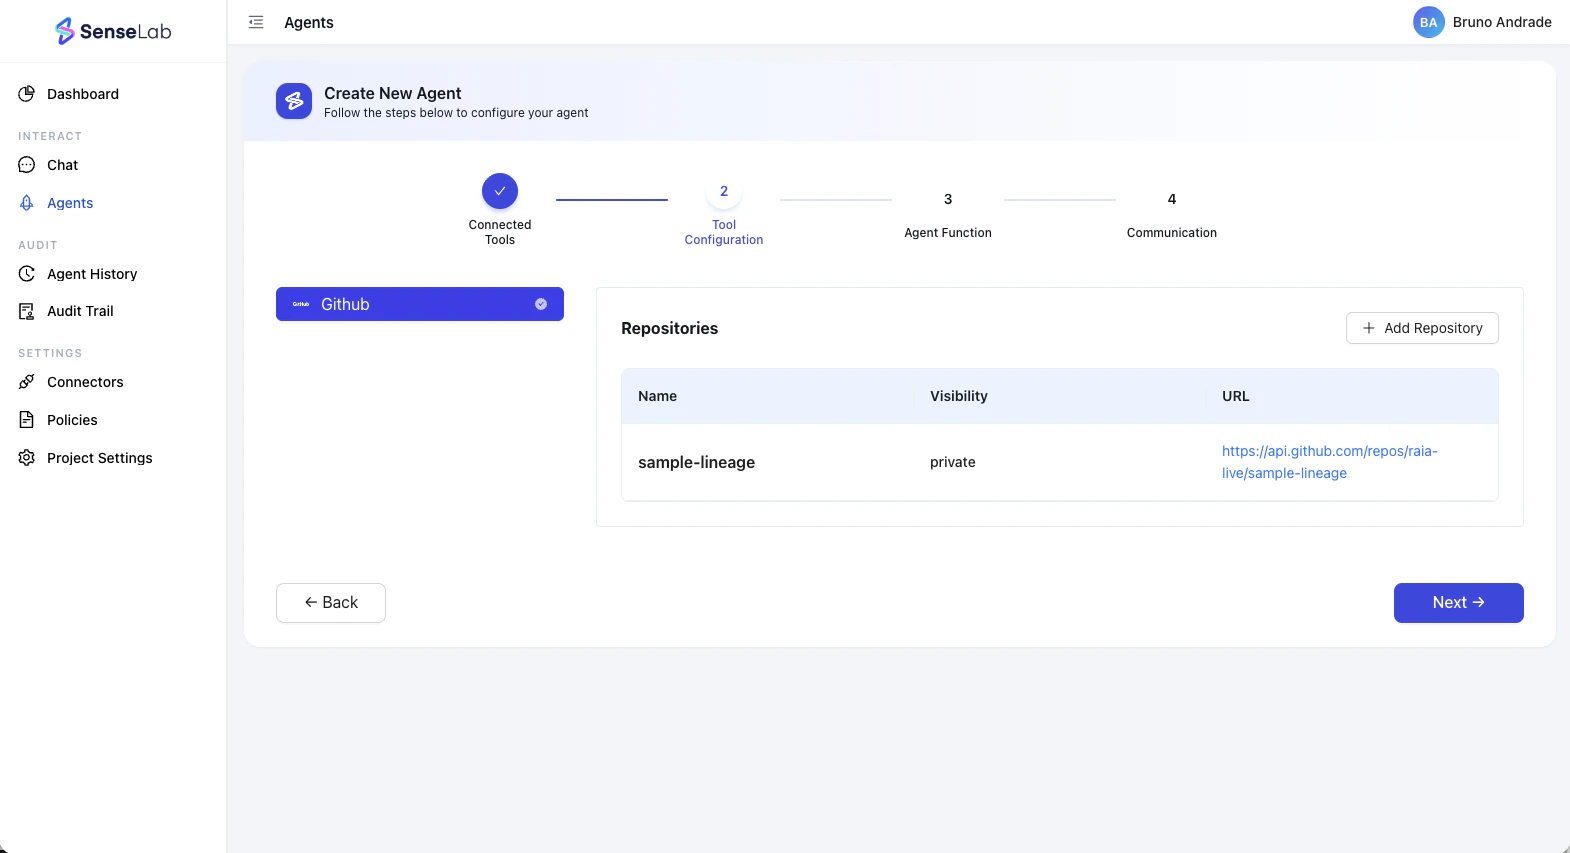
Step 2 — Configure repositories
In this step, you assign which repositories this agent will watch. Click + Add Repository. A dialog will appear showing all repositories available from your connected GitHub or GitLab account.- Select your Connector from the dropdown (e.g.
git-dev-myorg) - Check the repositories you want this agent to monitor
- Click Next
Step 3 — Agent functions
This is where you define what your Review agent will actually do. Choose from the available Review Functions: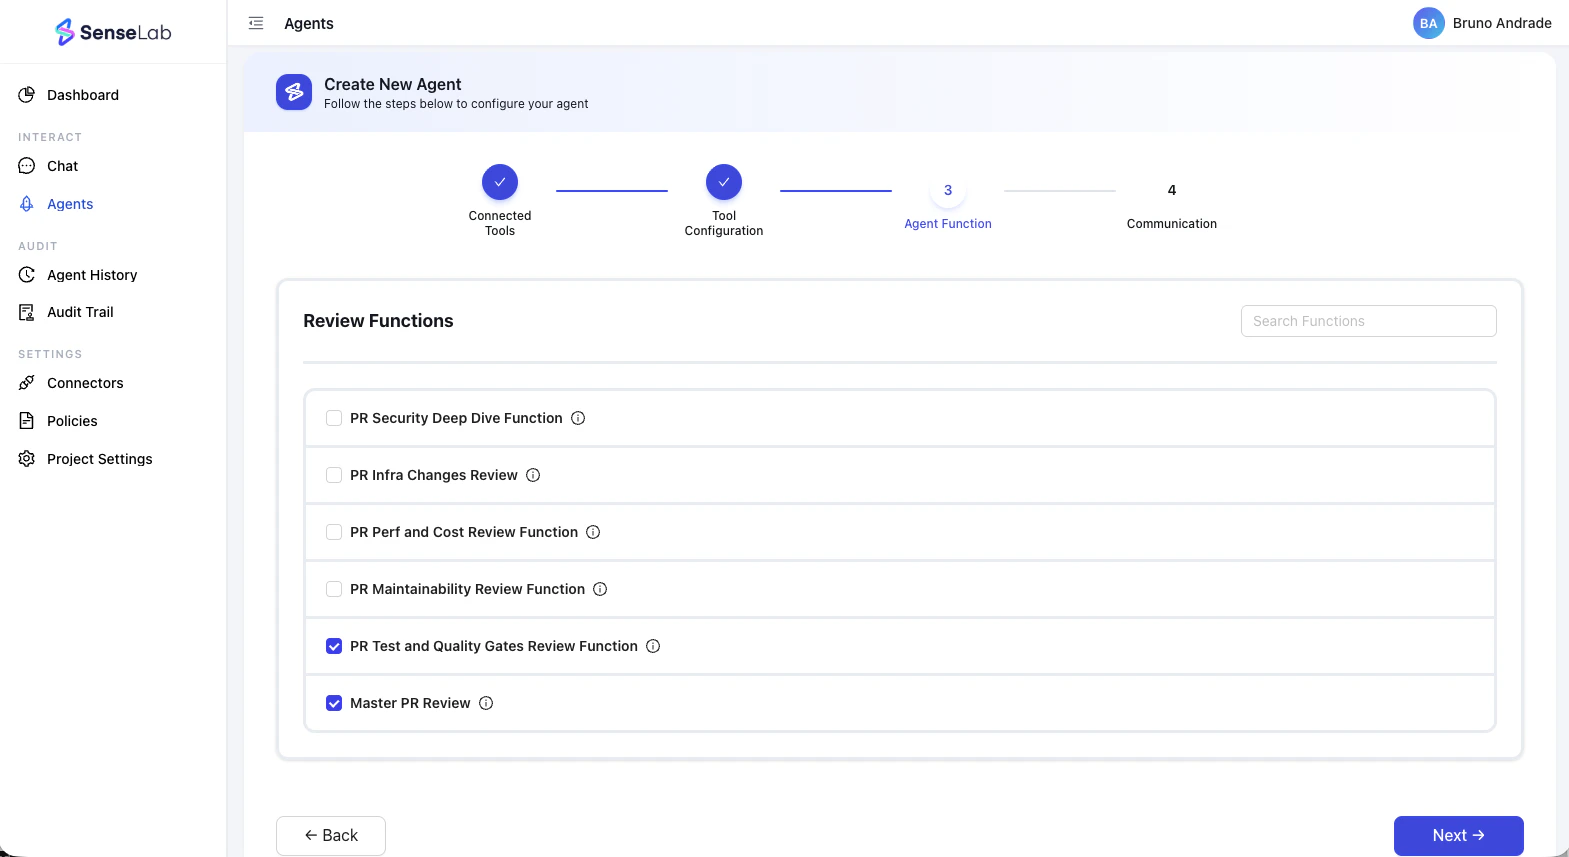
| Function | What it does |
|---|---|
| PR Security Deep Dive | Analyzes pull requests for security vulnerabilities, insecure patterns, and risky dependencies introduced by AI-generated code |
| PR Infra Changes Review | Reviews infrastructure-as-code changes in PRs — Terraform, Kubernetes manifests, Docker files, and more |
| PR Perf and Cost Review | Flags performance inefficiencies and cost-impact changes introduced in the PR |
| PR Maintainability Review | Surfaces code that will be hard to understand, test, or modify over time |
| PR Test and Quality Gates | Checks test coverage, quality gates, and whether the PR meets defined testing standards before merge |
| Master PR Review | A comprehensive review that combines all of the above into a single pass — the full picture on every PR |
- Select your Connector from the dropdown (e.g.
git-dev-myorg) - Check the repositories you want this agent to monitor
- Click Next
Step 4 — Set communication channels
In the final step, choose how the agent will communicate the findings to your team.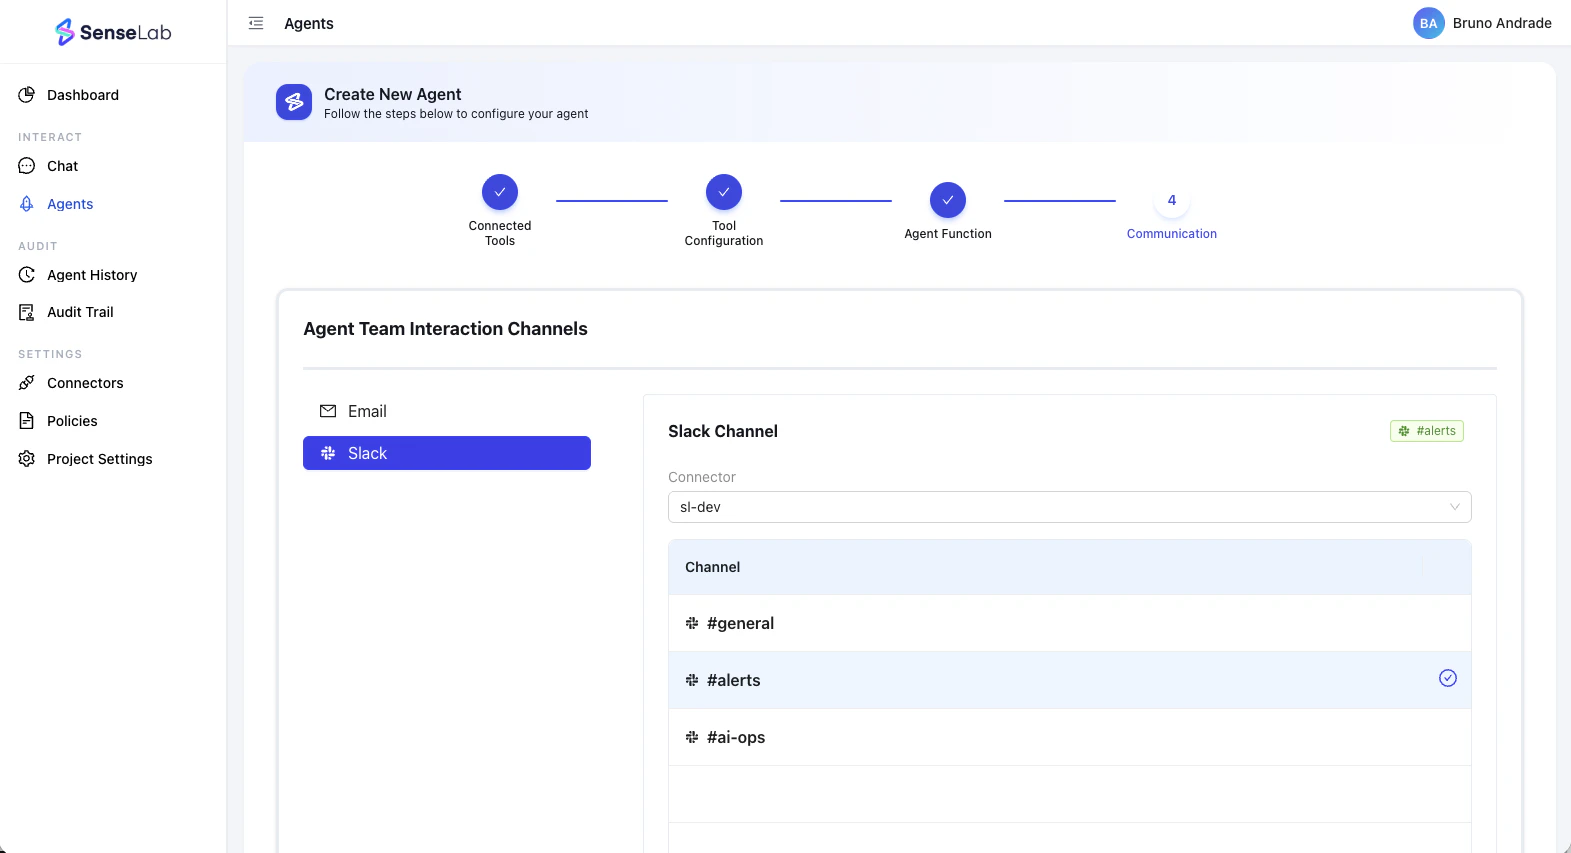
Your agent is live
Once created, the agent appears on the Agents page with an Active status and shows the connectors it’s linked to, who created it, and when.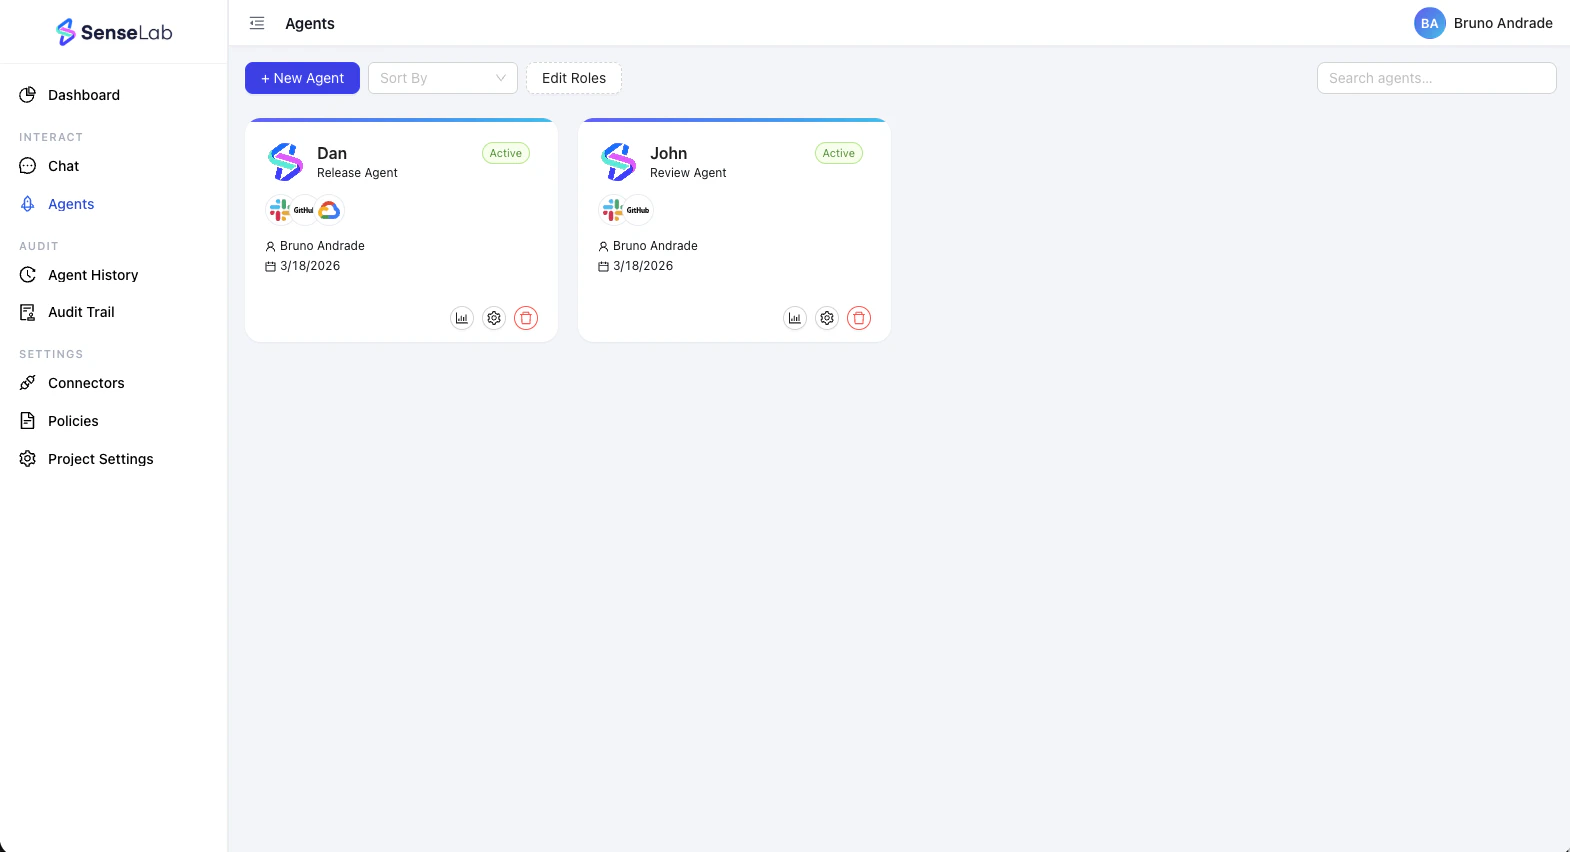
- View analytics — see the agent’s activity and findings over time
- Edit settings — modify repositories, functions, and communication channels
- Delete — remove the agent
What’s next
Review Overview
Understand what your Review agent tracks and surfaces on every PR.
Agent Connection
Add more connectors or install the GitHub App to enable PR reviews.