Prerequisites
- A SenseLab account — sign up for free with GitHub or Google
- Git is installed, and a local repository you actively develop in
- macOS or Linux (Windows support coming soon)
Step 1 — Install the CLI
Run the following command in your terminal:Step 2 — Sign up or log in
If you don’t have an account yet, sign up directly from the CLI. This opens the SenseLab web UI in your browser — sign up with GitHub or Google, and your CLI is automatically authenticated.Step 3 — Enable lineage in your repo
Navigate to your app code directory — this should be the root of a git repository where you and your team are actively writing code.Step 4 — Code as you normally would
There’s nothing else to set up. SenseLab tracks AI activity in the background as you work. You’ll start seeing data on your dashboard as soon as you commit and push code, exactly as you normally would.Data appears on your dashboard after your first commit and push. The more your team codes, the richer your lineage data becomes.
- Which AI tool was used (Cursor, Copilot, Claude Code, etc)
- Which model was active during the session
- Which files were touched
- Session duration and event count
- Whether a commit included AI-generated lines
CLI reference
All lineage commands are run from within a git repository directory.| Command | Description |
|---|---|
sense-cli lineage enable | Enable lineage capture in the current git repository |
sense-cli lineage disable | Disable lineage capture in the current git repository |
sense-cli lineage status | Show lineage capture status for the current repository |
sense-cli lineage sync | Manually sync locally captured lineage events to the SenseLab backend |
enable
Activates lineage tracking in the current directory’s git repository. Run this once per repo. All team members who clone the repo and have the CLI installed will also be tracked.
disable
Stops lineage capture for the current repository without deleting historical data.
status
Shows whether lineage is enabled or disabled for the current repository, and when it was last synced.
sync
Lineage events are synced automatically on commit and push. If you’re working offline or want to manually flush events to the backend, use:
Verify it’s working
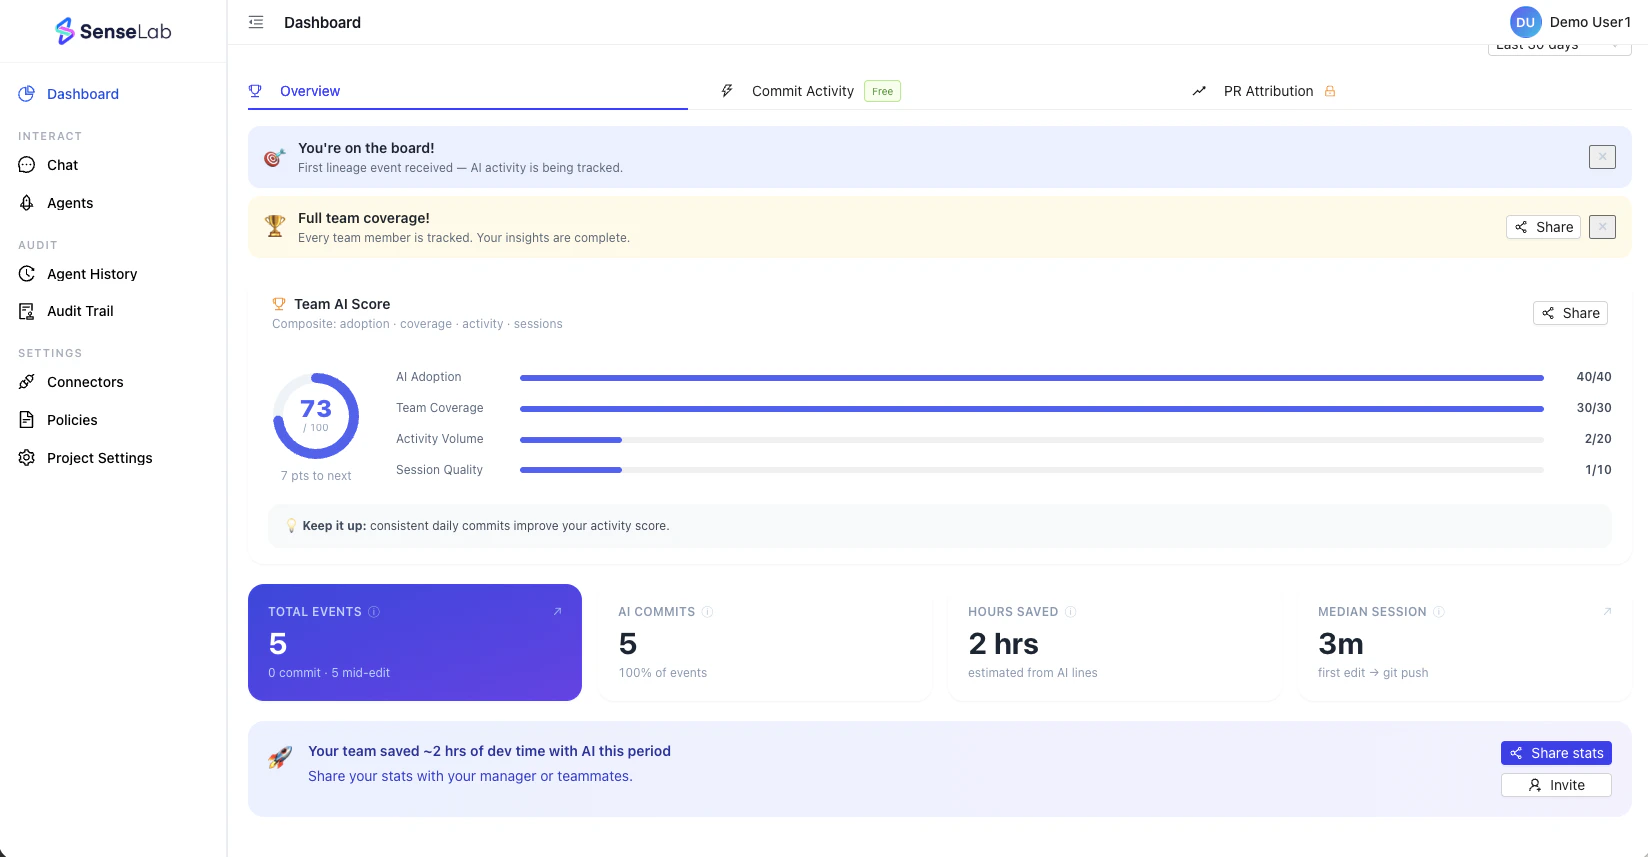
After your first commit and push, head to the dashboard and open the AI Lineage dashboard. You should see:- Your first event is registered under Commit Activity
- Your name appears in the Team Coverage section
- The “You’re on the board!” notification confirming your first lineage event was received
sense-cli lineage status to confirm capture is enabled, then sense-cli lineage sync to manually flush any queued events.
Invite your team
Lineage data is most valuable when it covers your whole team. Invite teammates from the dashboard — each person needs to install the CLI and runsense-cli lineage enable from within the same repository.
Track coverage under Team in the dashboard. Full team coverage means complete, unbiased lineage data.
View the full AI Lineage overview
See what’s in your dashboard and what every metric means.